STAGE 1: Ideation and Sketches
my 2 initial toy ideas and descriptions
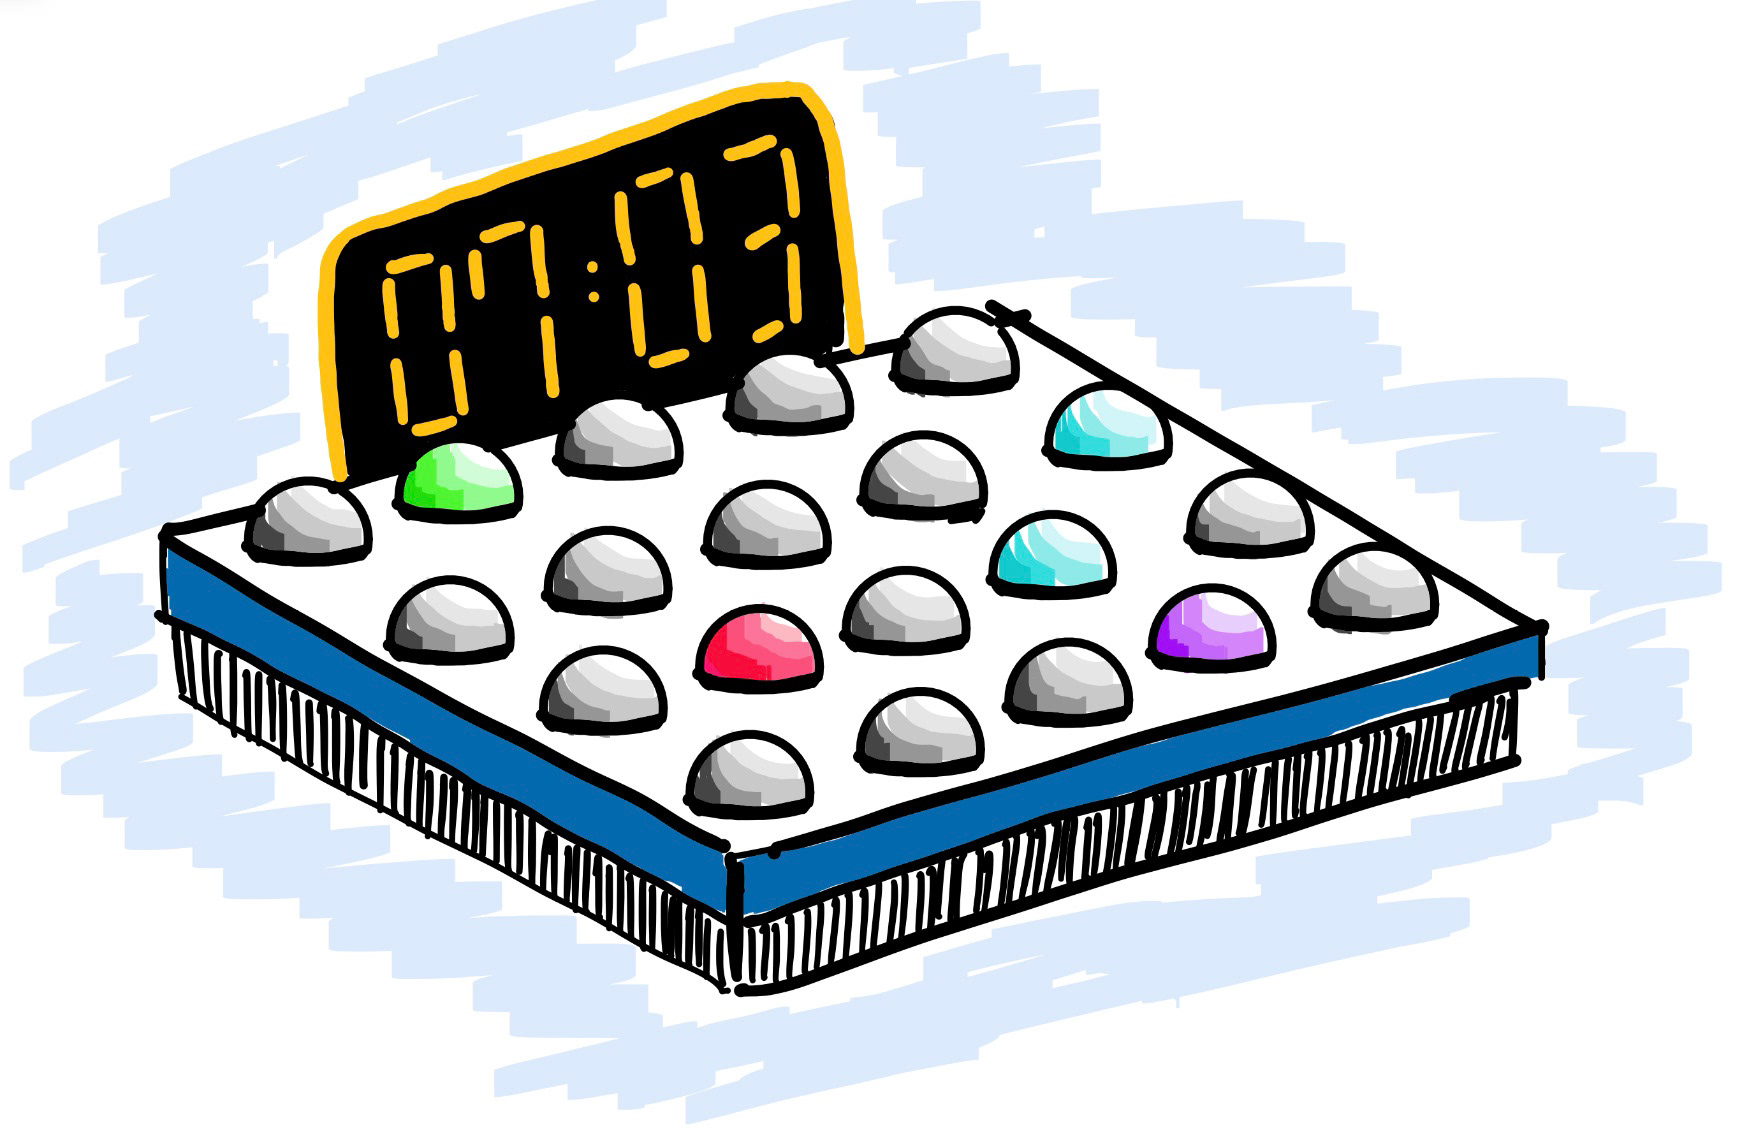
Introducing Button Bash! Buttons on the board randomly light up blue and red. Player Blue and Player Red must compete to press as many of their colored buttons as they can. If two or more buttons of the same color light up at once, bash them all at the same time to score the point.
See the score on the counter to keep track of who is ahead. Press the green button before it disappears to add time to the clock! But if you're ahead, it might help to press the flashing purple button to take away time. Whoever has the most points at the end of the timer wins!
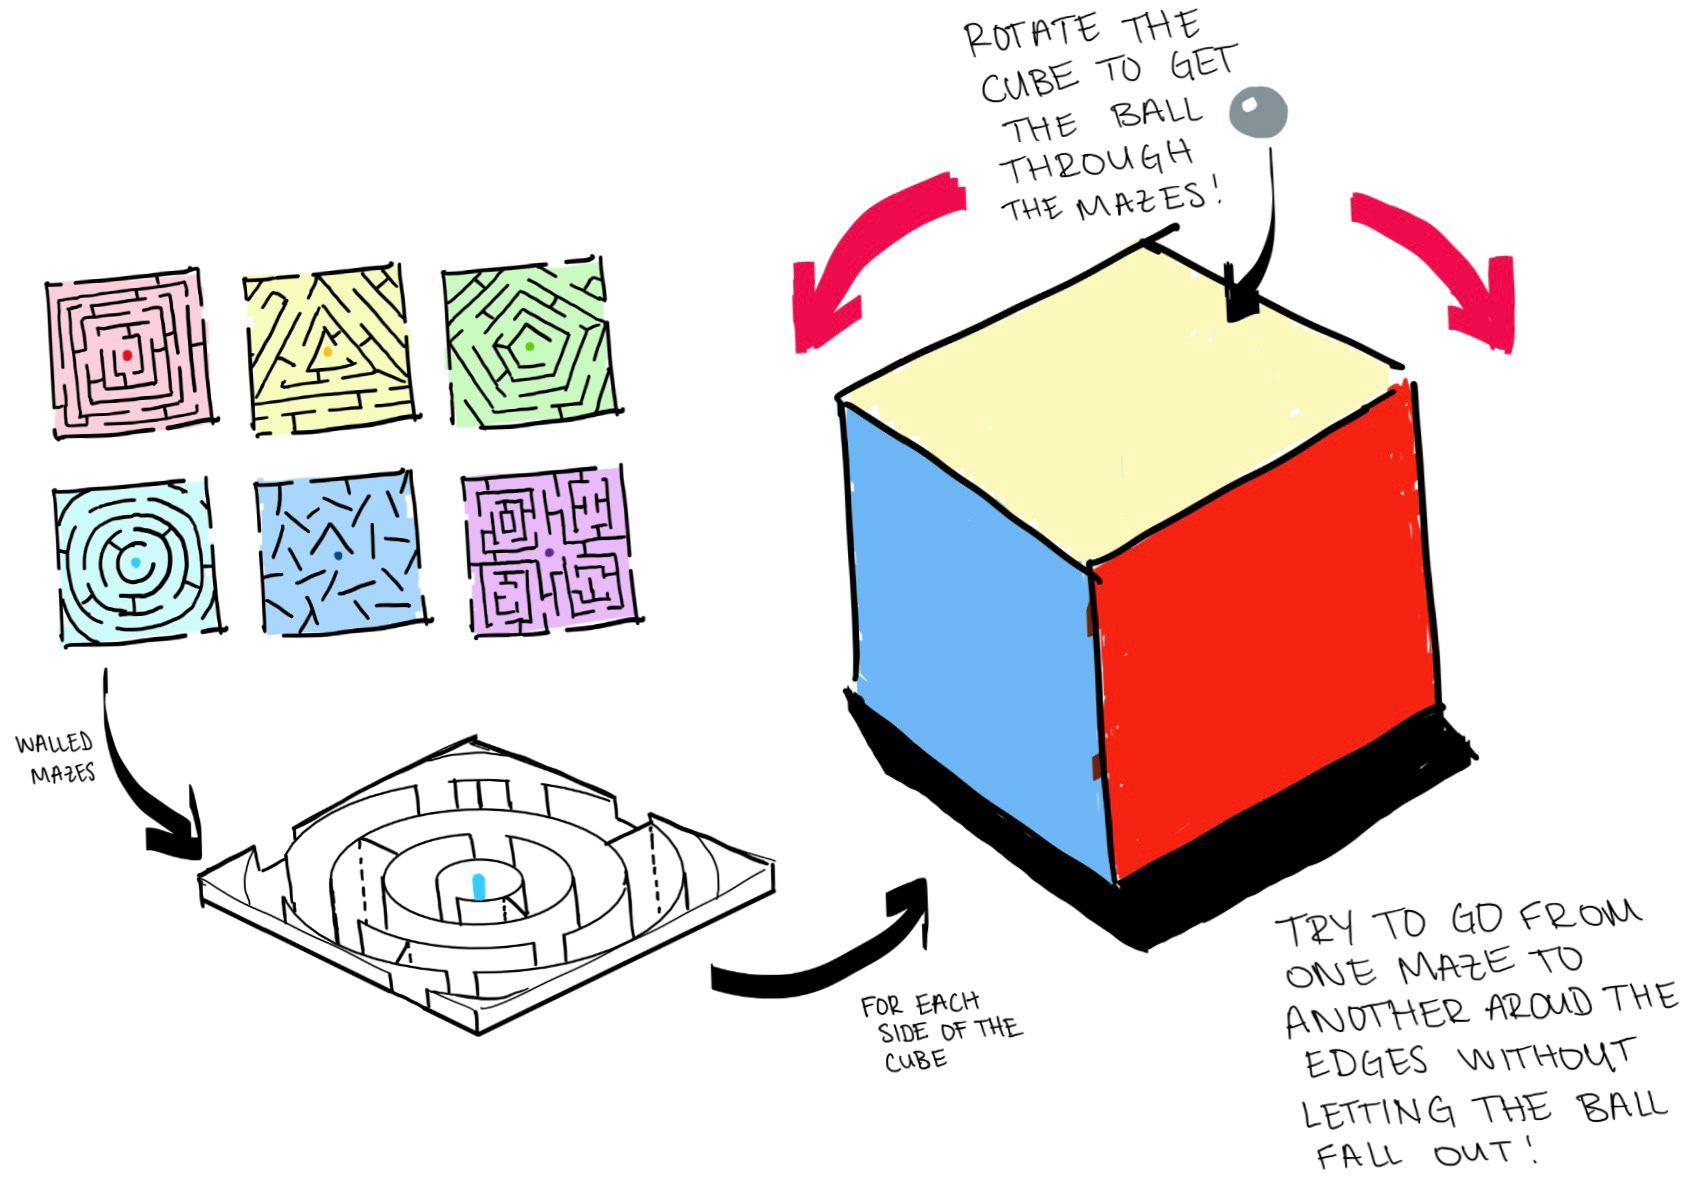
This six-sided labrynth will keep you entertained for hours! Each side of the cube has a different walled maze with a replaceable marker. Keep the marker in the center or move it around to make the search different each time you play!
This free-form game can be played however you want. Simply place the ball in the maze and rotate the box to work your way between the walls. Twist and turn on your own or alternate with others each time you get a marker. Can you get to all the markers without the ball dropping?
STAGE 2: CAD Modeling
done using fusion360

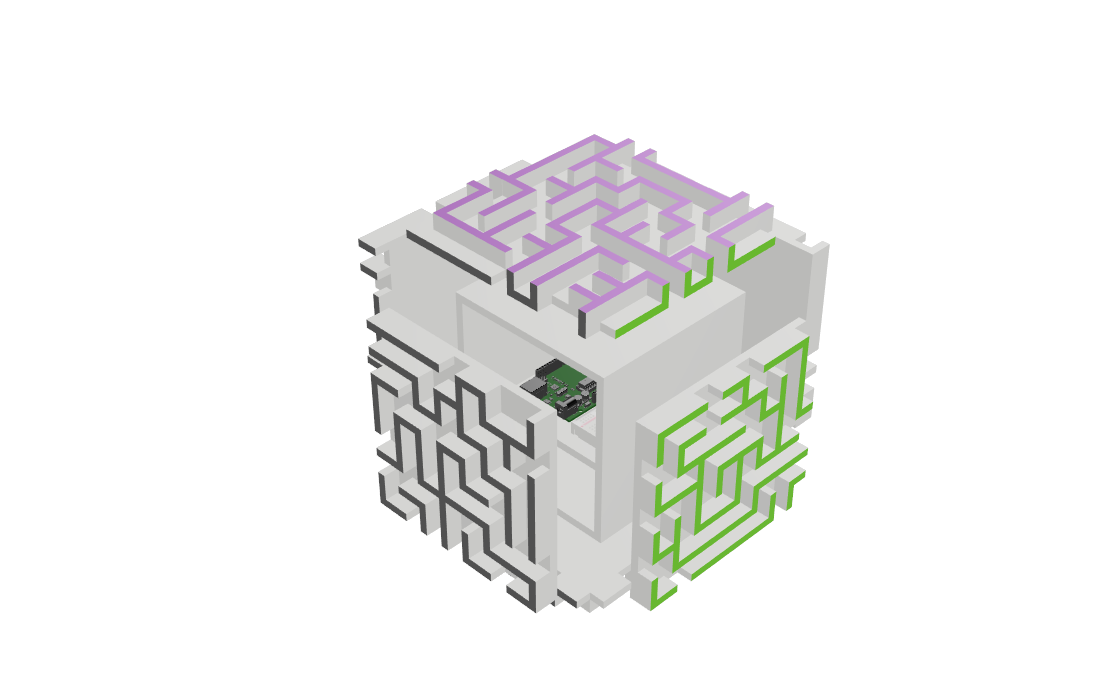
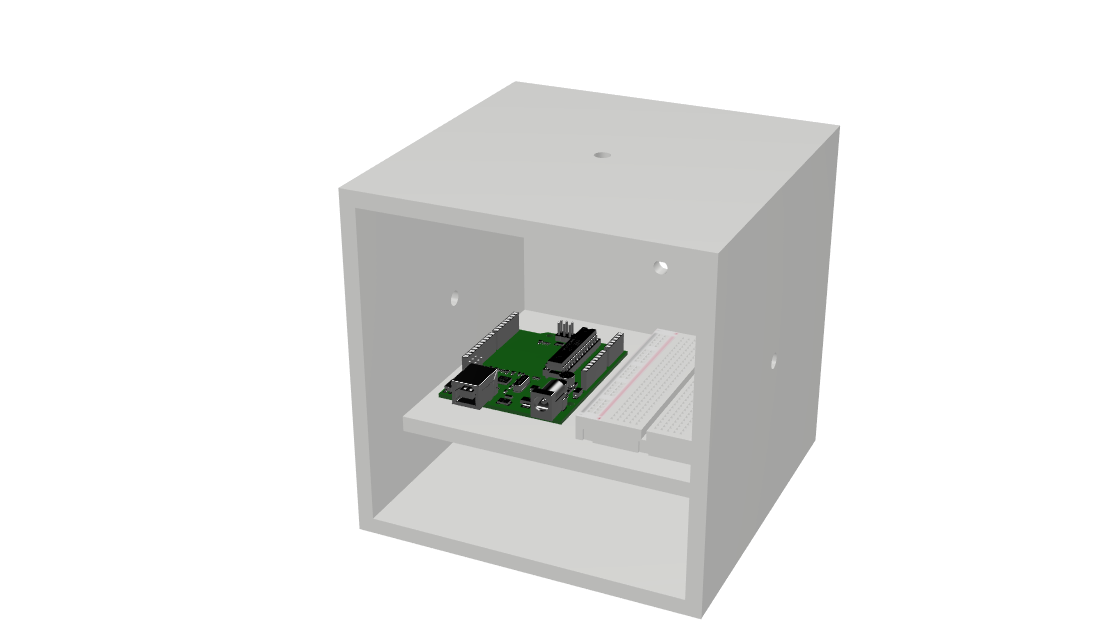
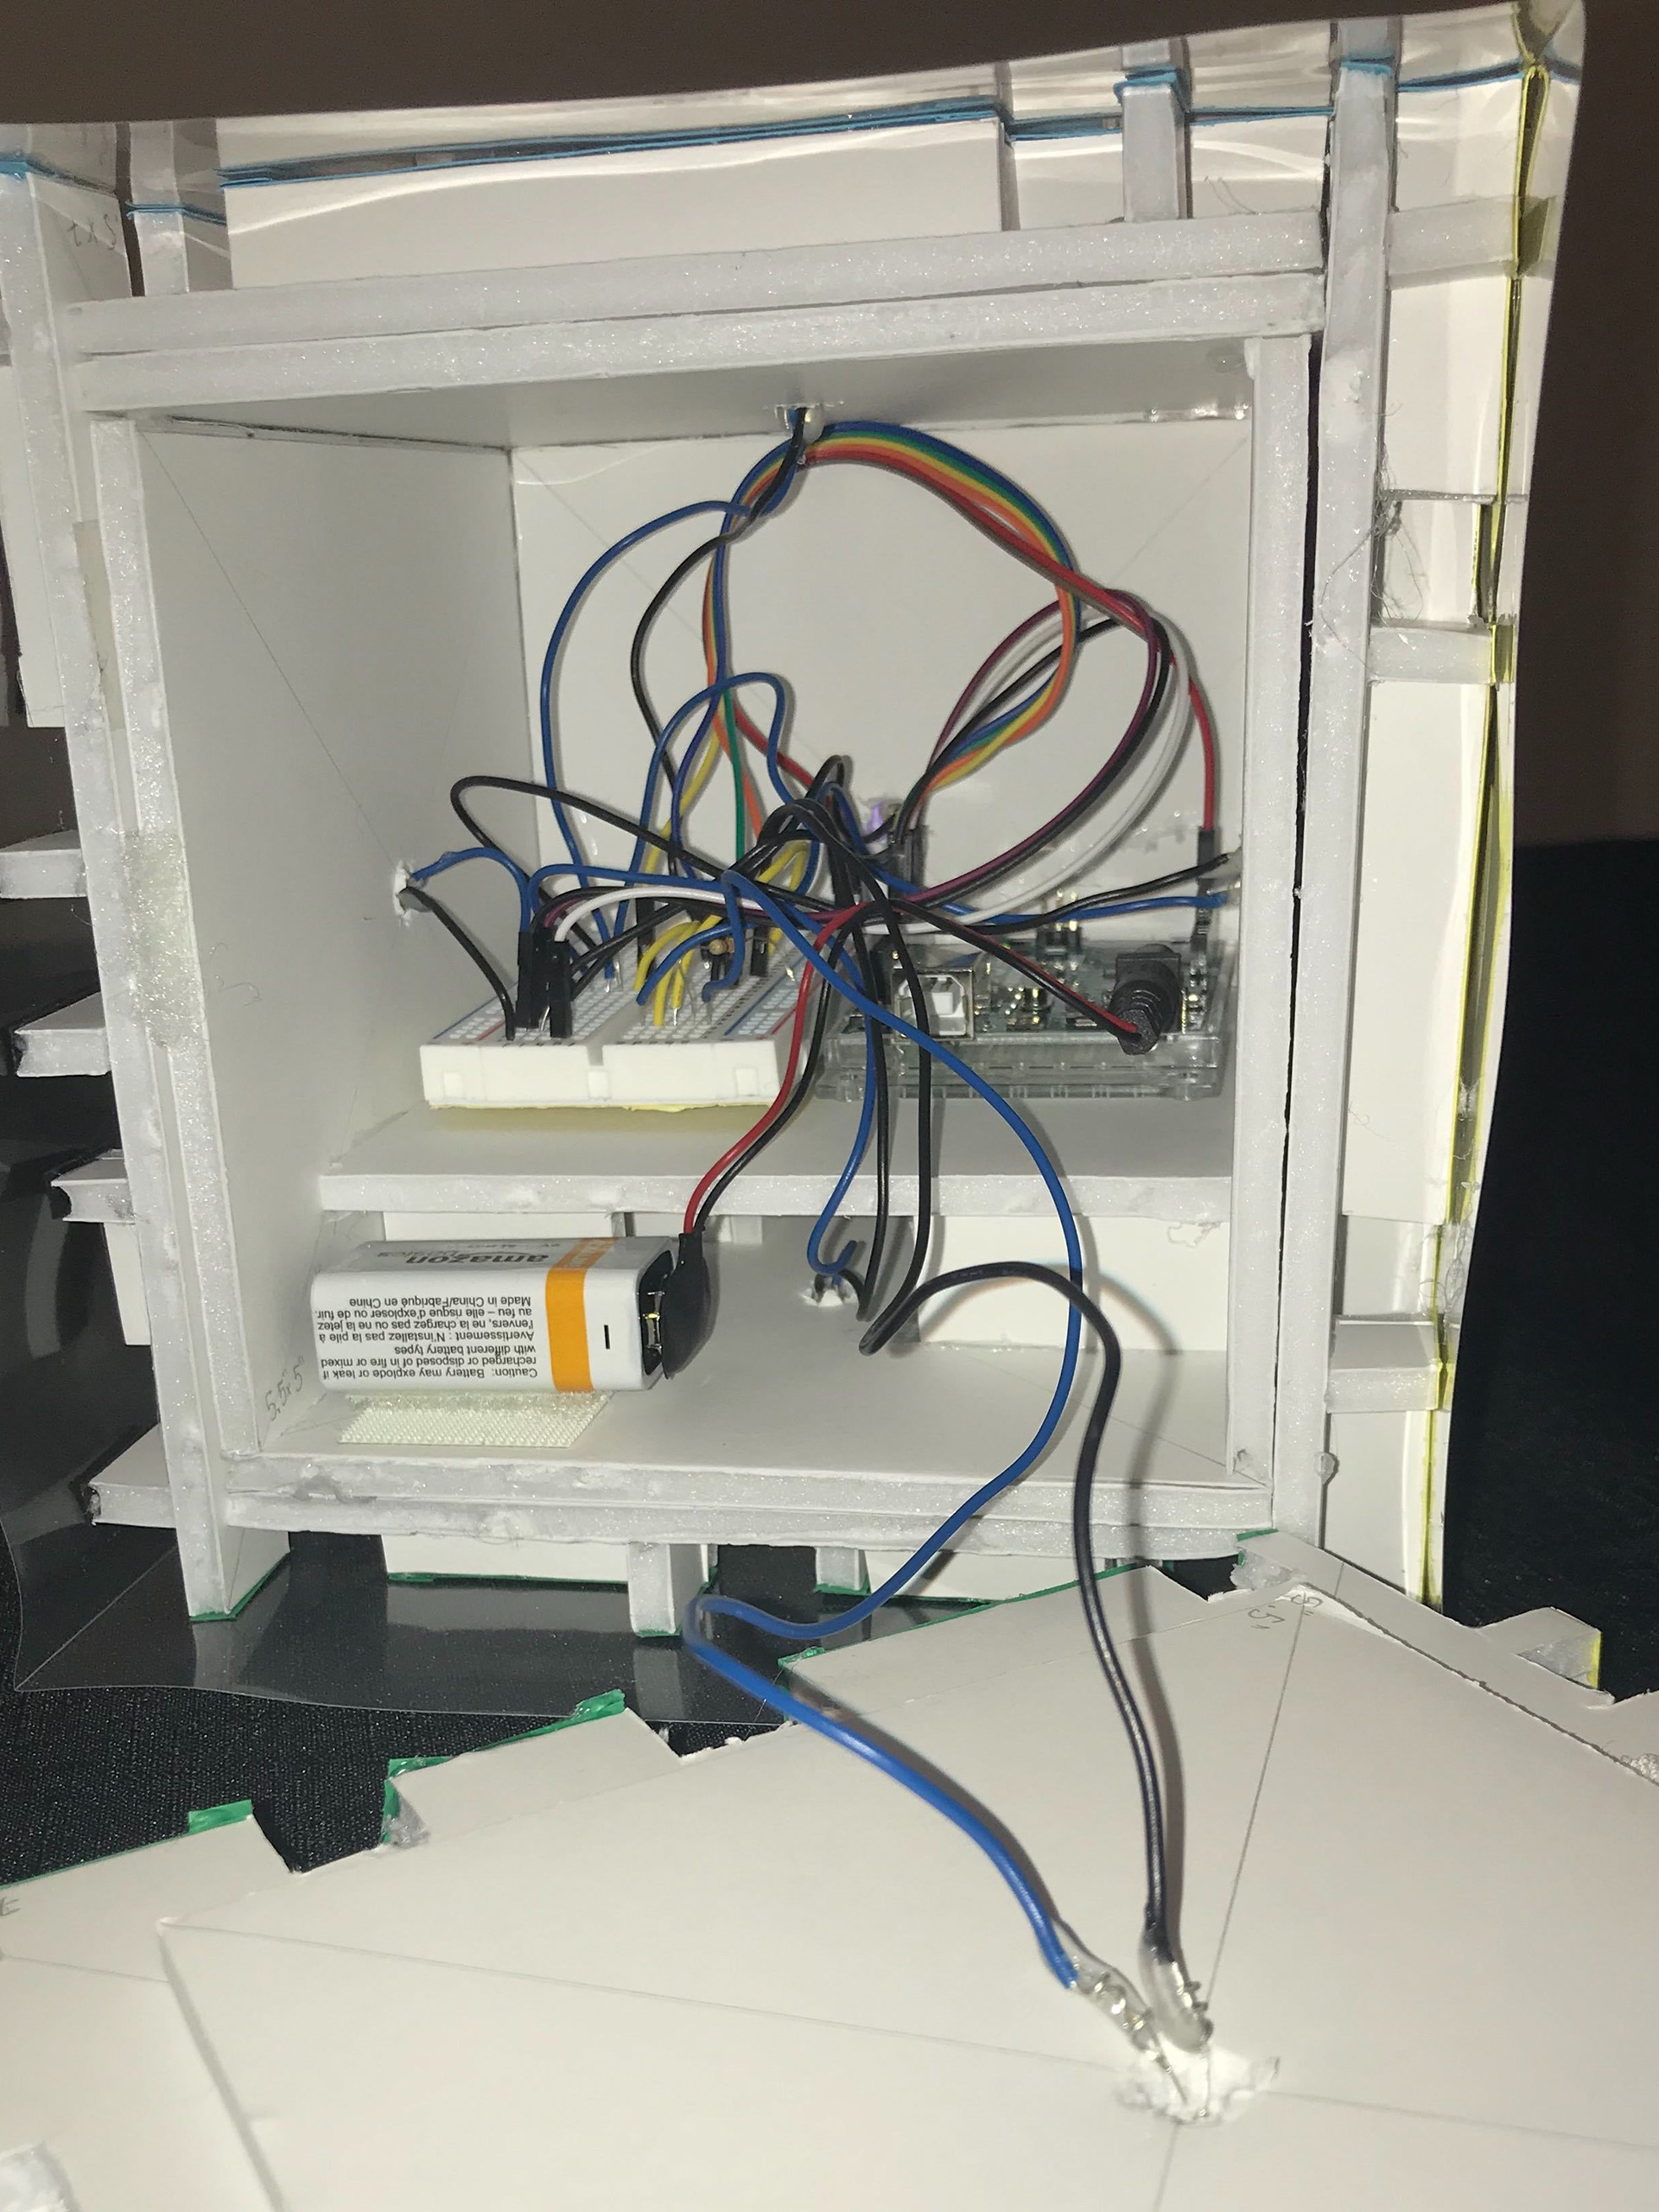
The walls are each attached to a core box that houses the Arduino and breadboard. Holes in each layer of foam sheet allow the 6 LEDs to poke out. The extra foam sheet that carries the boards is placed so that the boards don't have to be taped to the walls where the board would otherwise overlap LED hole. The supporting layer is also cut short enough to enable wiring to the bottom wall.
STAGE 3: Prototyping
crazy what you can do with just a little foam core
Manufacturing
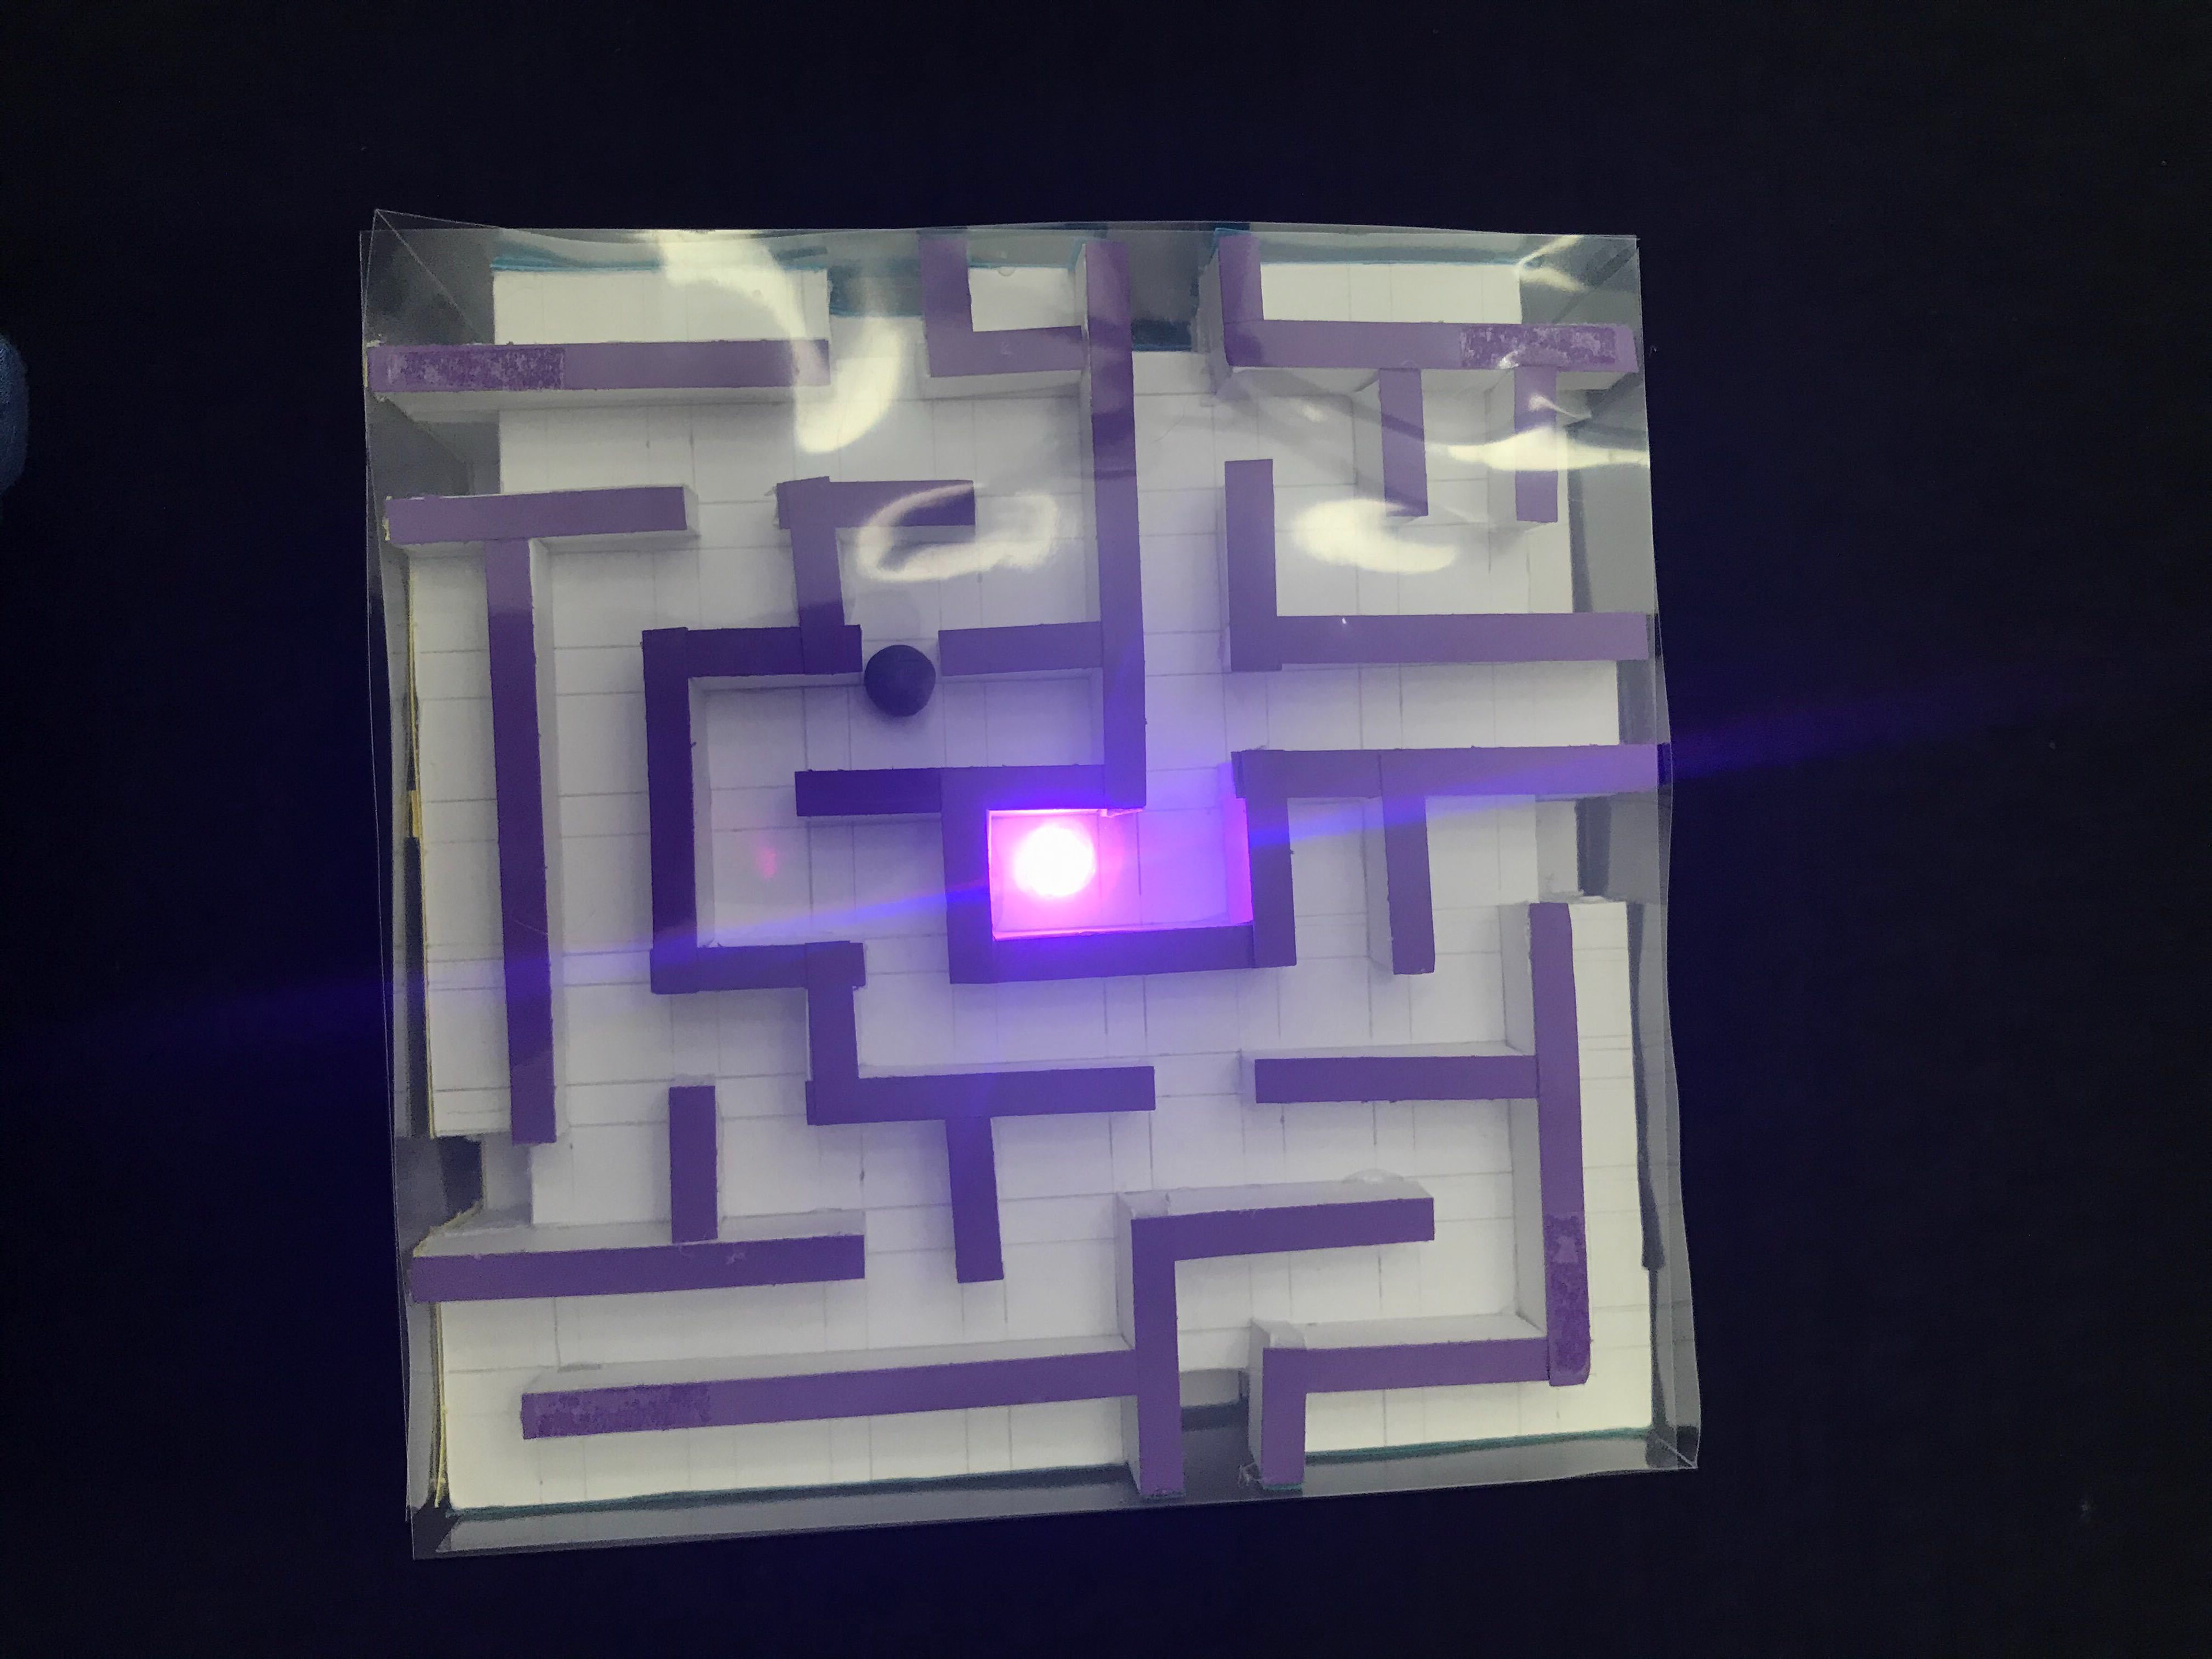
The maze cube is almost made almost entirely out of foam core held together by hot glue. There is a 5.5x5.5 inch core box to house all the electronics. Attached to each side of the core box is a 6x6 inch side with a different maze. Each wall of foam core side also has a centered hole through which the LEDs poke through. The walls of the mazes are 0.5 inches and but configured differently. To make the maze easier to navigate, I glued colored strips on top of the walls outline the maze and make it easier to see.
The ball is just rolled up clay, but it's the perfect size and weight. It's small enough to roll between the walls with ease, but just light enough to make it a challenge to control.
After having my parents play with the box for a while, we decided that it was too difficult to get the ball to transition from one side to another without it dropping. I then taped clear plastic sheets on top of the maze walls (leaving a hole on one side to insert the ball) so that players didn't have to worry about dropping the ball. It turns out winning the game was challenging enough.
Electronics
One of the sides is attached by velcro and can be taken on and off to adjust the electronics in the core box. The breadboard, Arduino, and battery are all velcroed down so that they aren't tossed around when the game is played. The breadboard and Arduino are also placed on a stand so that all 6 LEDs can be wired more easily.
Opening the box is also how you turn on the LEDs to incorporate the lights into the game. Simply plugging the battery chord into the Arduino will start the lights. The LEDs are coded to light up one at a time. Every 30 seconds, a different LED turns on.
How to Play
Simply place the clay ball through the opening and chase the lights! They change every 30 seconds! Twist and turn the cube to navigate through the 3D maze. Each side is accessible from another. Don't worry about dropping the ball when you're on the edge of the maze; the puzzle continues on every side! Topsy Turvy Turns is especially challenging because each maze can only be solved from certain side entrances. Be careful which path you choose!
You can also play relay style with friends and/or family. Pass off the cube every time the color changes and see who who can catch the changing light first. Or play a timed game and see who can get the most markers. Solve the topsy turvy maze however you want!

Playtesting
This is my sister, Olivia, who volunteered to be the first to playtest my prototype. You can see her solve the puzzle in the video above. Thank you ading!
STAGE 4: (Play)sentation
we had a lot of fun making this :) enjoy!